In the fast-paced world of design, presenting your work effectively can be as critical as the work itself. By using Blender alongside free 3D models of MacBooks, iPhones and other devices, I’ve found a versatile and powerful method to showcasing my designs. Here’s a detailed guide on my process, which is also perfectly suited for applying a similar workflow to showcasing bespoke packaging design.
Why Use Blender?
Blender is a free, open-source 3D tool that covers the entire 3D pipeline; from modelling and rendering to compositing and animation. Its comprehensive feature set and zero cost make it an ideal choice for designers wanting to bring their work to life in a three-dimensional space, and the Blender tutorial community on YouTube is incredibly helpful for newbies looking to learn the basics.
Finding Free 3D Models
The first step is sourcing high-quality 3D models. Websites like Sketchfab, Turbosquid, and CGTrader offer a huge variety of both free and paid models. For most of my projects, I seek out models of MacBook Pros, iPads and iPhones, which are ubiquitous in design presentations and relatable to clients and peers.
When selecting models, consider:
- Quality and Detail: Choose models detailed enough to effectively showcase your work. Look for high-resolution textures and accurate geometries.
- Licensing: Ensure the model is available for commercial use, and if there’s an attribution requirement, make sure to credit the author.
- Compatibility: Confirm the model format is compatible with Blender (common formats include .blend, .obj, .fbx and .glb).
Importing Models into Blender
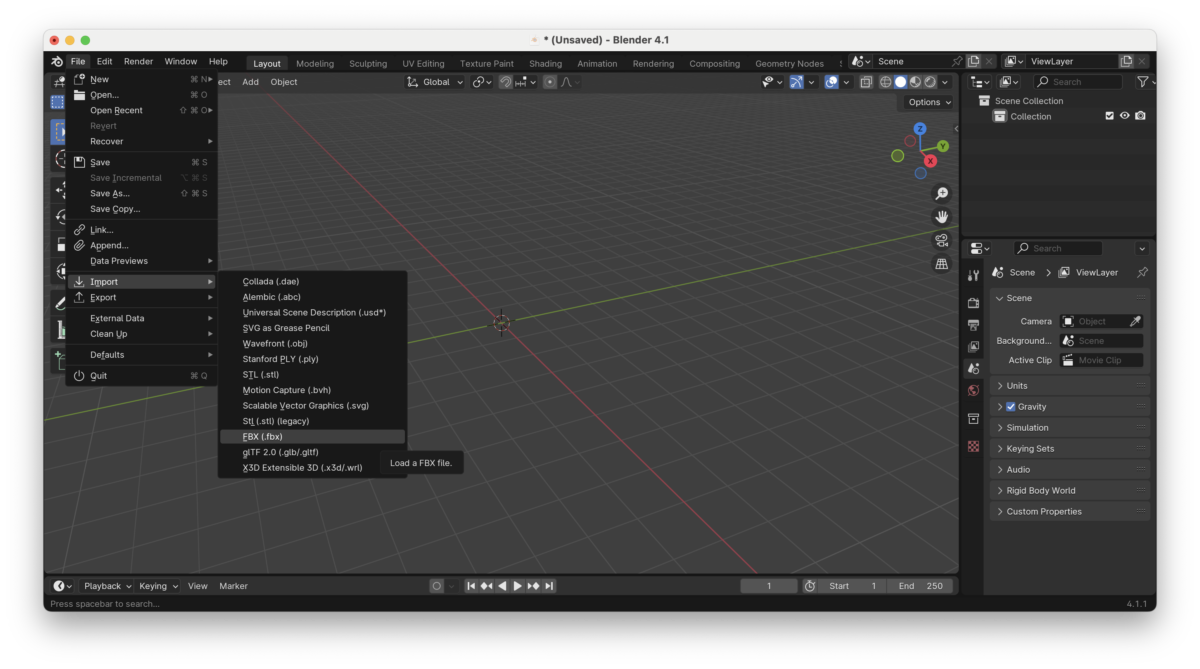
After downloading the 3D models, import them into Blender:
- Open Blender and start a new project. You can delete the default cube, camera and light by hitting the
A(select all) andX(delete) hotkeys. - Import your Model(s): Go to
File > Importand select the appropriate file format. - Adjust the Scale: If you can’t see your model(s) yet, they may be too small! Use the scaling tool (shortcut
S) to resize the model as needed.
Tip: If you’re finding scaling or trying to move the object is only affecting one part of your model, your model may not be parented together. You can Select Hierarchy from the navigator pane on the top most object to select all the parts.
Adding Your Designs by Image Texture Swapping and UV Unwrapping.
To effectively showcase your work, you’ll need to add your design(s) onto the screens of the device models. Depending on the quality of the model you’ve downloaded, you may or may not already have a default image texture mapped to the screen.
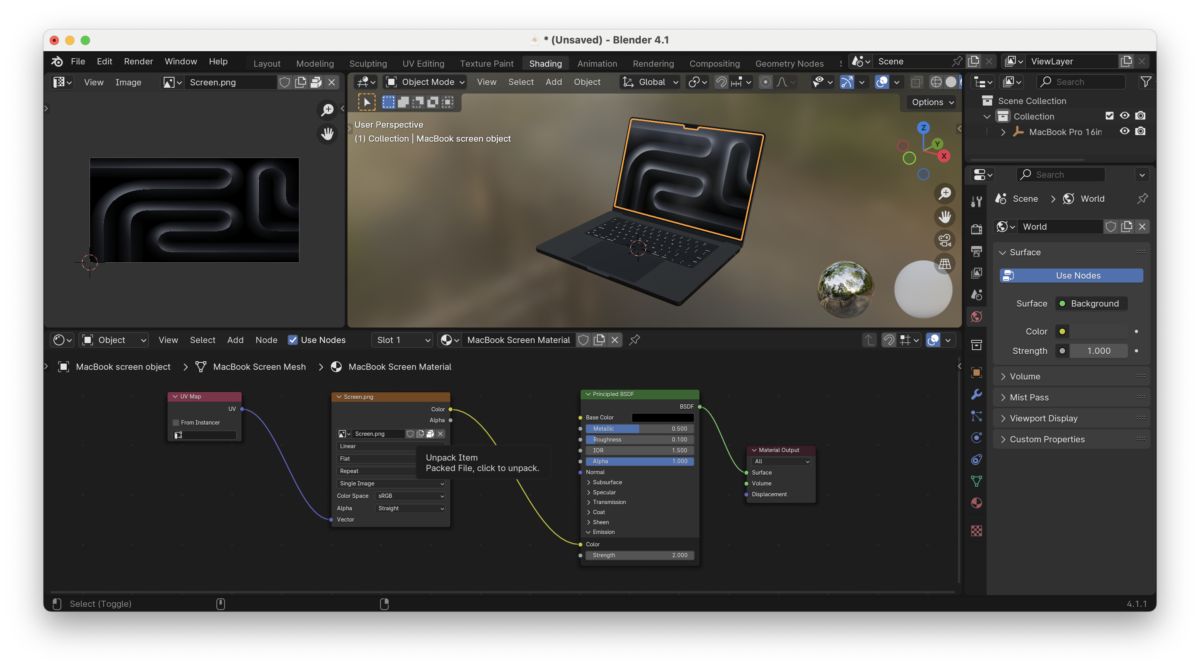
You have a screen image texture already:
- Find where the image texture is stored: Navigate to the
Shadingtab, and click on the screen of your device to select the material. Inside the Shader Editor view, or Image Editor view, you’ll find the image texture filename and some buttons alongside it. Notably, you may see “Open file” or “Unpack file” as the 3rd button. If it’s the latter, you’ll need to unpack the file before you can view and edit it in an external program. - Open and edit the image in your editing program of choice: Once you have unpacked the file, or can open the image file, you’re free to add and your product screenshot(s).
- Save the updated image: Once you’re happy with your edits, be sure to save. It’s best to overwrite this image with your new image to avoid needing to relink the image texture to the material, but if you do create a new Image instead, you can link it to the material by opening the file dropdown and choosing the new one instead. If Blender hasn’t updated the live preview to show your new image yet, you can manually refresh the image from the Image Editor view by selecting
Image > Reload.
You do not have a screen image texture:
- Create a New Material: Select the screen of the device, go to the
Shadingtab, and create a new material. - Add a Texture: In the
Shader Editor, add anImage Texturenode. Open your image file and link this image texture toEmission. You can increase the strength of the emission as you’d like, where higher values achieve brighter results. - UV Unwrap the Object: If your screen size doesn’t match the image, or it’s rotated, you’ll need to correct the UV unwrapping. You can do this when inside edit mode; go to
UV > Unwrapand adjust the placement and scaling of your design on the model.
Setting Up the Scene
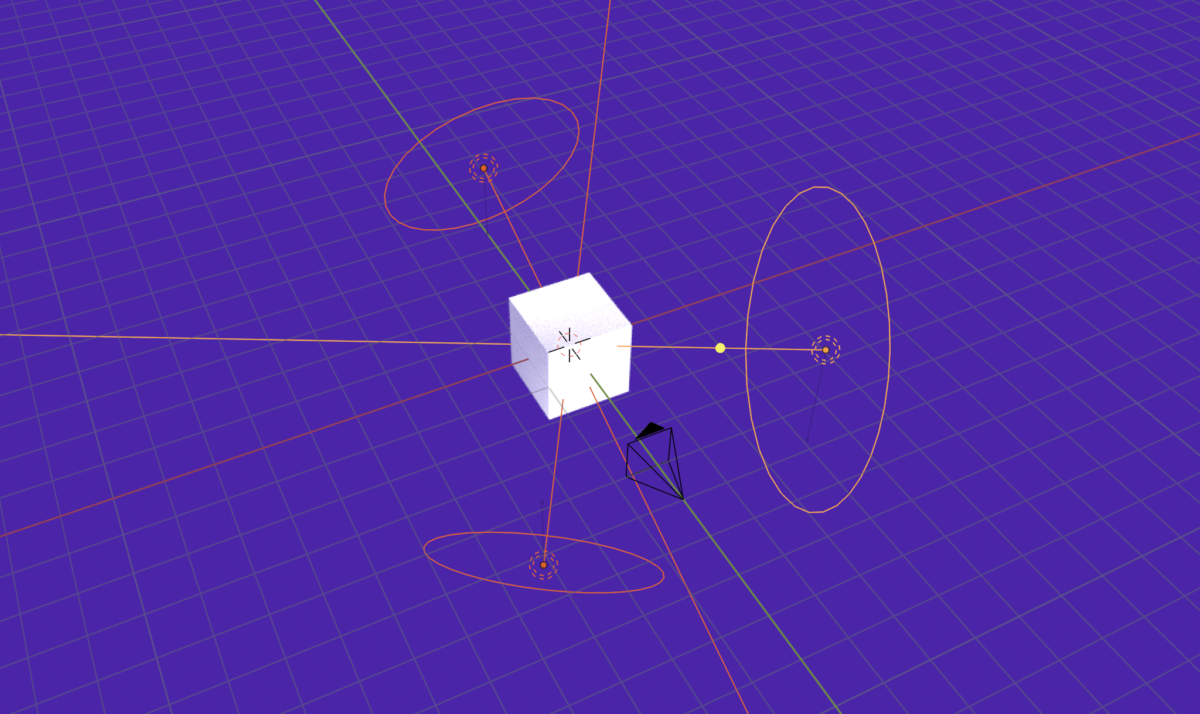
A well-lit, realistic scene significantly enhances the presentation of your design mockups. Here’s how I set up my scenes using a 3-point lighting system:
- Key Light: This is the main light source, placed in front and to one side of the model to create shadows and depth at a 45 degree angle.
- Fill Light: Positioned on the opposite front side of the key light, this light is less intense and helps to soften and fill harsher shadows.
- Back Light: The brightest of lights, placed behind the model, this light highlights the edges and helps to separate the objects from the background.
You’ll also need to add a camera if your scene doesn’t have one. I like to choose Perspective and add a Depth of Field to create a subtle out-of-focus blur to elements further away from the World Origin.
Rendering the Final Image
Once everything is set up, it’s time to render the final image. You will need to add a camera to your scene if you haven’t already, and adjust the output dimensions and filetype in the scene (not camera) properties panel.
- Render Settings: Adjust the render settings for optimal quality. I typically use the
Cyclesrender engine for realistic results, and set a maximum samples of 1024.. - Resolution: Set a high resolution to ensure the final image is crisp and clear.
- Render: Hit
F12orRender > Render Imagefrom the menu to render your image. Depending on the complexity of the scene, this may take some time.
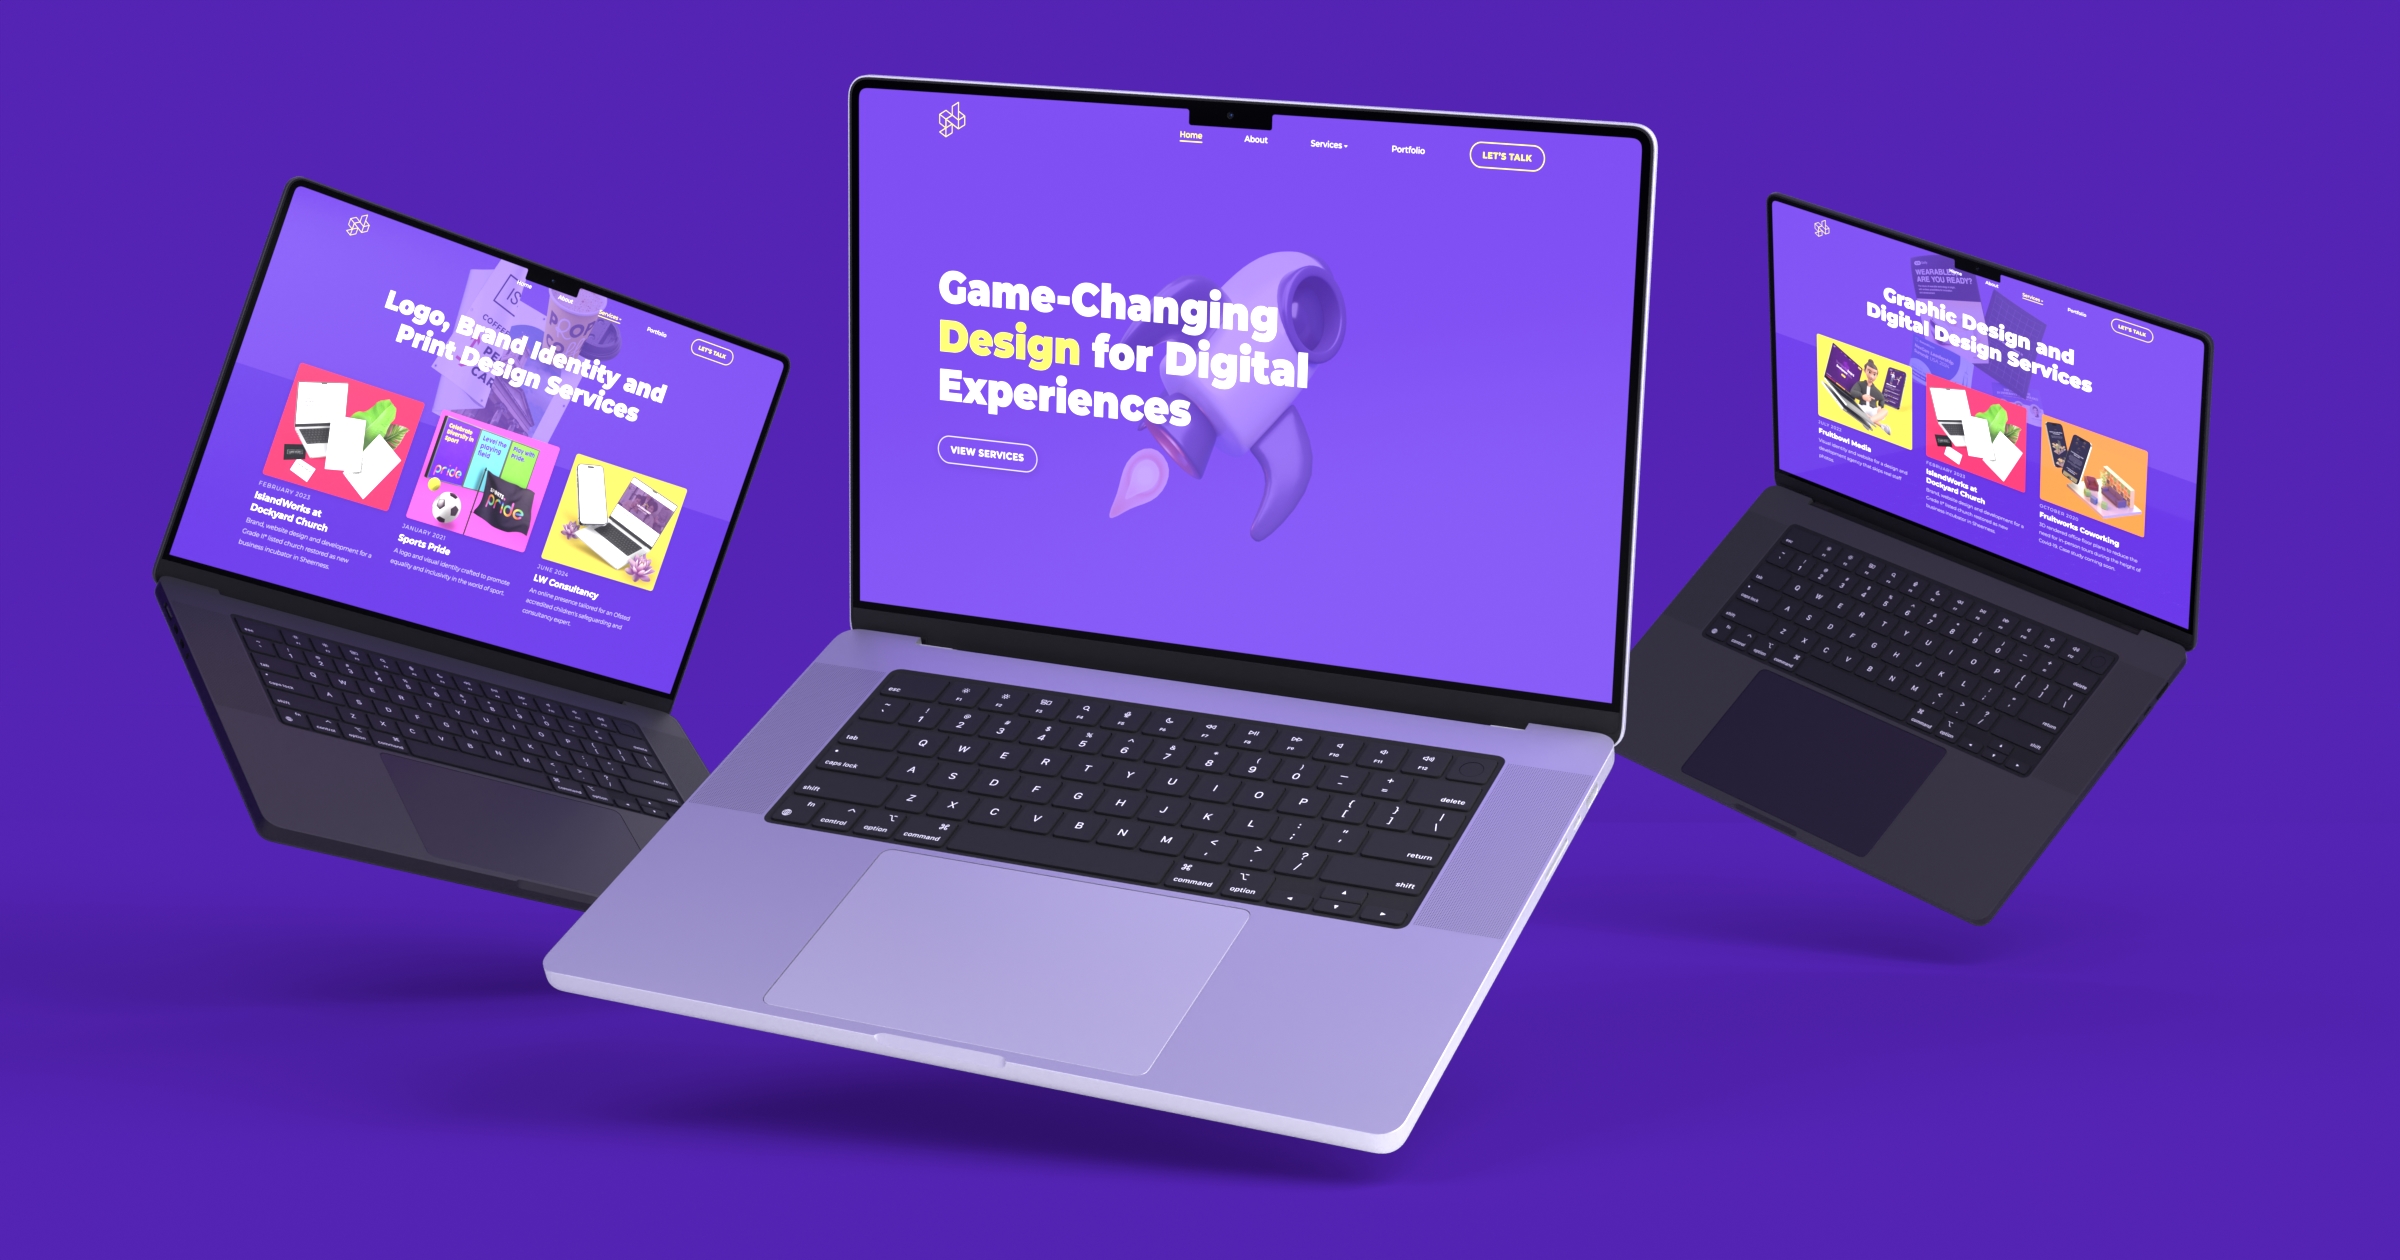
Using Blender and free 3D models of devices is a powerful way to present your design mockups professionally. This approach not only makes your portfolio more engaging but also allows potential clients to visualise your designs in real-world contexts. Whether you’re showcasing web designs, app interfaces, or packaging design, this method can elevate your presentations and help you stand out in the competitive design landscape.
Additionally, creating mockups this way opens up a lot more creativity than just using free online PSDs. While resources like Unblast and similar sites are great, relying solely on them can lead to a lack of uniqueness since many designers use the same templates. By using Blender, you can customise your mockups extensively, ensuring your presentations are truly unique and tailored to your specific needs.
If you’re interested in seeing how I apply these techniques to packaging design or want to collaborate on a project, don’t hesitate to get in touch. Let’s work together to create impressive, professional design mockups that truly showcase the creativity and quality of your work.
